OpenPlug | Studio : things to consider

Talking about one code base and multiple devices is a tricky affair. In that case there are various frameworks and platforms which strive to do that. One of the most beautiful platform I found is OpenPlug|Studio. Well, being an Actionscript developer and working on Flex SDK, one will certainly feel at home with OpenPlug|Studio. Being said that, there are some very subtle differences to consider while creating applications with this platform compared to Flex itself.
1. Its loosely based on Flex 3 SDK. That means there are things like “mx” components like “WindowedApplication” is present in it. The work flow is similar to any Flex 3 based project. But then it is recommended to use “mob” namespace based components for they are mobile optimized for almost all devices. Again this OpenPlug|Studio SDK, which is known as Elips SDK only supports a subset of Actionscript 3.
2. Almost all the “mob” components are final classes. The immediate effect is one can not extend native “mob” components to create a new component.
3. The display object containers do not include “MovieClip”.
4. Using the available flex/actionscript frameworks is a strict no, as to one will end up writing the whole framework again for this OpenPlug|Studio (Elips SDK). For this ElipsSDK is a subset of Actionscript 3.
5. I was trying to open an image in the device with the default photo viewer application on Android, but then at the end came to know that this is not possible. Though Elips SDK provides the component, which can display the photo. I think, that indicates we can use Elips SDK to view images, run videos/audios with SDK components but can not directly force the default players/viewers of the device to launch the files.
6. About the “List” component I have already shared my views in the blog post earlier. Just use a default “ItemRenderer” to use the “List” component for the time being, until the Elips SDK fixes the bug.
7. Accessing the file system is a little tricky! I was trying to access file system of an Android phone , both phone memory and SD card memory. While the document says, it could be accessed as

Path to access memory card is: app-storage:/ExternalStorage/ 
Path to access internal memory is: app-storage:/InternalStorage/ 
In AIR, it corresponds to subfolder in app-storage:/, to keep Flash compatibility for simulation.

But in reality I could never get into the file system with them. The in-phone memory access I still have to find a way, the SD card file system can be accessed as

var extFolderPath:String = File.applicationStorageDirectory.nativePath+ "ExternalStorage";
var externalFolder:File=new File(extFolderPath);

8. Javascript can be used inside the Application with “script” tag as

mx:Script source="test.js"

This is interesting as from inside javascript file one can access the components with their “id” as one accesses them in Actionscript. But take care not to use any javascript libraries here as this is not DOM manipulation we are doing but using javascript syntax to do our Application. I have not tested the loose typing metaphor of javascript with a project, will update when I do that.
9. The OpenPlug|Studio is a free IDE and it works on both Mac and Windows. There is a plugin version, which could be installed over a FlashBuilder and a standalone version which could be installed separately without any dependencies. And the forum at the OpenPlug|Studio site is quite active, though it may not be instant but at least you will get your answers within a decent amount of time.

I thought would put my experiences here, so as to it may help someone out there with similar kind of problem.

Using List component in OpenPlug

OpenPlug|Studio ships with its own SDK and though it seem like FlexSDK dependent, there are native components to work with for mobile devices. The major or the most used native component is List and one can access it as

mob:List id="allSDCardFiles" 
	x="0" y="0"
	height="100%" width="100%"
	rowHeight="45"

While it is expected to work fine and it does work fine in the simulator, but when tested on device (I have used an Android phone to test), the application simply crashed. Well the problem here is a bug in the baseSDK of OpenPlug. So till the bug is fixed the simple solution is to use a default itemRenderer. The fixed code will look as

mob:List id="allSDCardFiles" 
	x="0" y="0"
	height="100%" width="100%"
	rowHeight="45"
        itemRenderer="ListItemRenderer"
	

That simply works every where from simulator to the device.
Hope that helps someone out there.

My first workable Android application, AFinder.

On my quest with different tools/languages, I started on OpenPlug|Studio for developing in Android. Though this is a tool for developing for multiple devices, I specifically tried this for Android for the time being.
This IDE is based on Eclipse and there are two flavors of installations. One installs it directly as a standalone IDE and you have option to install it over FlashBuilder. The development is also based upon the same component style development as in Flex SDK. There is a different name-space for mobile specific UIs. they start with “mob” rather than “mx”. From compiling to publishing as an .apk file for android device installations are quite straight forward. The best part about the IDE is its completely free. Well then it has potential as to one codebase and publish to multiple platforms. The community at OpenPlug|Studio forum seems active too and one can feel there are a lot going behind as to fix up bugs and add new features to the tool set. Though there are bugs and features to be added, but as I said, once you involve in forum, you got to know they are already working on it and new releases are happening almost in 2-3 months.
Here is my basic Android application to move around your file system on the device. Would love to listen the feedback.

Making menus with Html-CSS

Continuing the basics of HTML and CSS, lets go further to see how CSS really changes the way of rendering the basic HTML structure. We will be creating some horizontal menus with CSS. The basic HTML structure needed is nothing but an un-ordered list.

  • Page One
  • Page Two
  • Page Three

Well, since these items are going to link to some other pages or other places, we must add some links to them. After all, what is a menu item without a path or link to it! So the final structure will be as below. Note that we have put all the items inside a div with id as “nav-Menu”.


In a real scenario the “href” value would be a real URL, either relative or absolute. But that is part of the content, let us concentrate on building the menus. So all in all the HTML part is over! Thats it! Yes, thats all to it. One simple un-ordered list with links in the list items.
Lets move on to design it with CSS, so that it looks as a horizontal menu items instead of vertical lists. First things first, lets get rid of the default styling of the list items, the CSS would be as below

#nav-Menu ul
{
	list-style: none;
}

Next is to push the list items so as to they come on one line. The CSS for these would be as below

#nav-Menu li
{
	float: left;
}
#nav-Menu li a
{
	float:left;
	display: block;
	width: 9em;
}
#nav-Menu
{
	width: 30em;
}

Thats all to it. One thing to remember here is everything now is a just fine for the menus. But there would be the contents after these menu items and they will be placed after the last menu rather than below the menu items. The fix is to add a style to the next elements with

#main-content
{
	clear: both;
}

Now its the time to add some more visually appealing style to the menu items we just created. These styles are basically margins, borders and color, so the final CSS for the menus look as below.

#nav-Menu ul
{
	list-style: none;
	padding: 0;
	margin: 0;
}

#nav-Menu li
{
	float: left;
	margin: 0 0.15em;
}

#nav-Menu li a
{
	float:left;
	display: block;
	width: 9em;
	height: 2em;
	line-height: 2em;
	border: 0.1em solid #DCDCE9;
	
	text-decoration: none;
	text-align: center;
	
	color: #0D2474;
}

#nav-Menu
{
	width: 30em;
}

Hurray, we have just created a horizontal menu bar with menu items from a simple HTML un-ordered list.

Aptana Studio, free IDE for web design.

This may be apparent by now that web design is not graphics in a page or the colour of the background of the webpage. It has gone well beyond that and for the same reason web designers are attracted towards an IDE (Integrated development environment) that would be best suited for this need. Previously the WYSIWYG kind of IDEs were a thing to look for. But currently it is the web standards, clean code and ease of use is what everyone looks for. Fortunately we are not limited to Notepad in windows or TextEdit on MAC.
One such IDE is APTANA Studio. This is based on the opensource Eclipse IDE. Current version of the IDE is much better than its previous versions and now it comes with project templates for HTML5 applications. There are project templates which are already installed with the IDE itself. There is an option to choose the template to use in your project, and if you are connected to internet then there are options for a template to be downloaded from the source control systems like github. This makes a perfect case for people who are just beginning to use Git or not used to it. That means whenever you create a project with these kind of templates, you are bound to get the latest one form the repository. So you will get the benefit of the awesome developer and designer community, who is constantly contributing to the original source code. And one does not need to know the inside working of the system. Thats a huge plus point.
Well, by this time you must have sensed that Git support is inbuilt with the IDE. So one can always see if the changes are committed or not. That way it will make your code constantly tracked by version control systems. There is a built in terminal(command prompt) inside the IDE. So one dose not need to open it separately to work in a command prompt.
Next is its look and feel and working in different operating systems and this IDE simply the same IDE in Windows and Mac operating systems (I have not tried the Linux version yet).
This supports a lot of languages starting from HTML, Javascript, CSS, PHP, Ruby and Rails. While writing my own CSS and javascript the code hinting and responsiveness of the IDE just blown me away. Its just those simple features, which, if one gets used to, then there would be no coming back to a bare-bone IDE like Notepad or TextEdit. While editing CSS, and adding a colour value, there is a little display as to which colour this value is representing! Thats just too good. There is a web previewer inside the IDE itself, if one needs to test the design one need not leave the IDE too.
Overall in my opinion this is one of the IDEs to get used to if one is doing web design in current age.

Water rafting for the first time

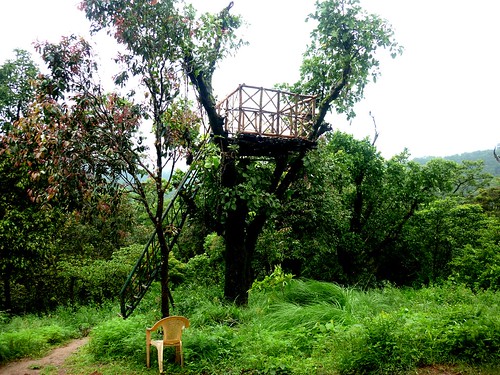
tree house!
Last weekend I am fortunate to visit Coorg, a hill station near Bangalore. I must say, it was a beautiful experience. A must visit for anyone who loves nature. There is a beautiful waterfall, a place you should not miss. Just sheer nature and its love, one can only feel.
waterfall

There are natural cottages made for staying back. And the good thing is electric power is only available for 2 hours in night. Thats pretty awesome. As it was cold outside and almost all the time raining, one does not need electricity at all. There are these little candle lights and the night just seemed more enjoyable.

Well, this place seemed part of a wildlife sanctuary, so on our way we happened to see some wild animals as bear and deer.
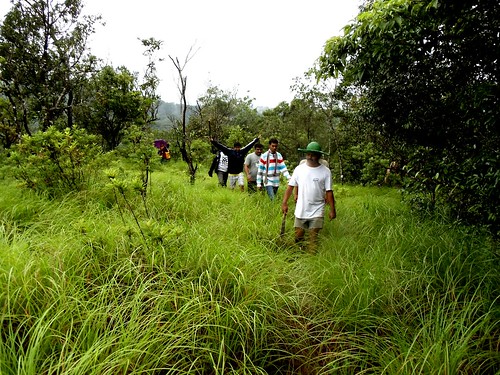
We did a small trekking around the hill and must say it was an exciting experience as there were leeches on the path, the whole path was filled with leeches. And one is bound to get the leeches, so the best part is how to deal with problem when we have to go with it. That was the learning of the life time. And you know what? Leeches are not dangerous at all, people in that area are habituated with it. So the advice we got is, take a lemon with you all the time. Once you get a leech on your body, put the lemon juice into it. Do not panic and scratch the leech, as one can not get that thing out with hand. Well the most interesting part is when leeches suck your blood, you do not feel any pain!! They will come to your body, suck your blood up and go away as soon as they are full, and sometimes they burst also after drinking too much of blood, LOL :) .
trekking with Leeches
The most important part is, one is bound to get the leeches on one’s body, so the choice is whether to go on the trek or not? That is the lesson to learn. Fun and excitement comes and brings some sort of frightening moment but if you do not panic, just enjoy the moment and go with the flow without trying to control it, you will feel the full potential of nature and as such life also :) All of us got some leeches on our body too :) I got frightened once I saw one leech was just getting into my shoes!! It felt very frightening to me for once, tried removing it from outside, but as I said you can not remove it with your hand. Do not panic, remove your shoes, put some lemon juice and there you go. And one more thing, if at all you find one leech on your body, the damage is already done to you, the amount of blood it needs is already sucked!! So no point panic. I was carrying 3 more leeches with me, until I reach the base camp, where I found they are still with me travelled all the distance from the mountain.
water rafting
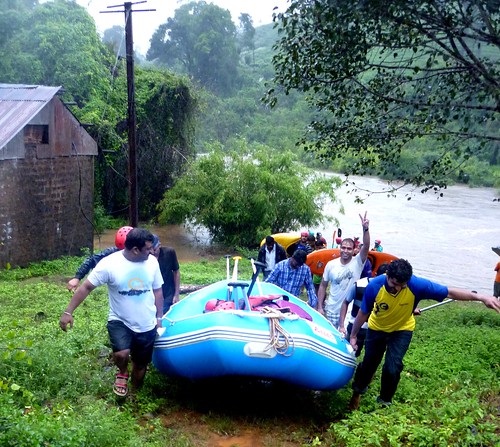
Then came the first time in my life, water rafting. It was just as awesome as the wind, rain and wild water in this high force mountain river.
water rafting
Must say, I got a fantastic team with with. All of us were almost for the first time but almost all of us were ready to make it. The most interesting part is all most all of us are either do not know swimming or just do swimming pool swim. Looking at the river, the flowing water and its speed make us all nervous but then we had already decided to make it. Thanks to the wonderful guide in our boat, he was encouraging us all the time. Once we got stuck in the bushes somehow, it seemed a tough job to get back to the flowing water. For it was very tough to push the boat inside water, against water. We kept our cool and enjoyed the beauty of nature. That experience was just mind blowing. Two other guides came to rescue and we were back on the flowing water. Rest was just enjoying the flow and speed of water, the turbulence and water hitting all our faces, water coming inside boat and we kept moving with the constant instructions of the guide. Finally all of us reached safe and made an amazing experience.
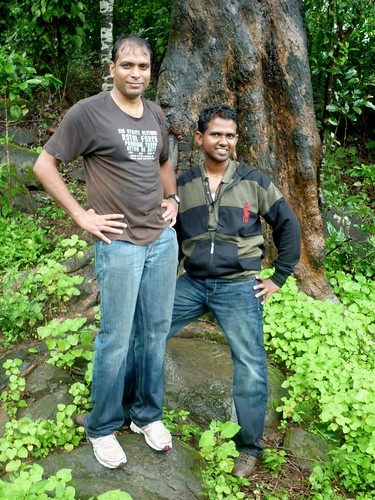
its me
I would say, must try, yaaaaaaaahhoooo.

Removing the tracking of files, already tracked by Git

If you work on Git then you must be knowing once we fork(or initialise a repository) a repository, all the files inside that folder get tracked automatically by Git. Well, thats not a problem if we really want all of them to be tracked all the time. But the problem starts when there are some files we need not track. And the worse happens when all of the files are being tracked and now we decide to remove some files from being tracked. The handy command is

$ git rm --cached readme.txt

And for folders

$ git rm --cached docs/

There is an option to set a rule for Git to ignore all the files, one need Git to ignore from tracking. This rule is set in a file named .gitignore. Remember there is a dot (.) before gitignore word name. All those files which need to be ignored must be mentioned in this .gitignore file. The tricky part is .gitignore will not remove files from tracking by Git if those files are already being tracked by Git. In those case the above “git rm –cached” trick will help.
The way I do it regularly is add the .gitignore file in the beginning inside the folder I am going to initialise Git repository. That only works if I know which files I need to ignore in the beginning only.
There is a set of .gitignore templates for different languages at Github, That is a great help in the beginning of configuring the .gitignore for different languages.

OpenPlug released for FlashBuilder 4.5

If you are a flash developer, then the easiest way to create a cross device application is to use OpenPlug Studio. The feature list of the tool can be read here in detail. While the standalone version of this free tool is in its alpha version, the FlashBuilder version was out for sometime.
The best part of the new release is, it now supports FlashBuilder 4.5.

Let go. It always works.

I generally tend to hold it for a long long time. And finally when I let it go, the solution is right in front. Yes, I always got to the solution but not with holding things, but with let go!
It is generally said that, do not get too serious with life else you will not get out of it. It took a long time for me to realise that. First of all its people arround. Those who themselves are not happy, want you to stay worried and they will do all possible logic calculating how to make you that. So be aware not to fall in trap. It will not help. Believe in your own self and make a choice to be happy. Leave everything behind and just be happy now. Once you do that, things will unfold.
Once you let go, the situaion itself knows that you are not trying to fight it with logic but intuition and that’s powerful. Once you do that you will find solution in front , will come from somewhere you have never ever imagined. That works for me and may be you try that.
Belive in self and let go things will do wonders, while logic can solve mechanic problems, life is not mechanical at all. Happy living.

Posted from WordPress for Android through my “HTC Wildfire”.