Phonegap is not ready yet.

This may sound like not true, but actually Phonegap(Cordova) is not ready yet for the prime-time. The point is something or the other will always get in your way if you try to do a little more than basic UI.
It’s a pity to see that Phonegap has reached a version number of 3.3, still feels uncomfortable to work with.
While for a basic static page navigation it may be a solution to go for, for mobile, but think twice if the UI is becoming even a little more than basic.

A simple childbrowser (inAppBrowser) is failing in the current version and I found people are finding workarounds or solutions to fix this. So the point is not that its fixable but its not dependable.
Again, from version 3.0.0 on-wards, one need to have an internet connection to start building! Well, its NPM and NodeJS, I know, but its not comfortable at all rather confusing.

The best Phonegap version as I know is 2.8.0. Its the stable of all.
If at all you are trying to develop on Phonegap, stick to this version(2.8.0) until they release a stable version again.

Happy coding.

My first Tizen store approved game

Its a pleasing experience to get something on the stores, which are more stricter or unknown. Being said that, it is exciting when something is out of the doors from those stores. It was the same feeling for me when my first Apple store approval has happened.
So the game which was written for iOS devices is modified to fit in all the platforms and released. The original “catch them all” game is ported to all the platforms with the help of OpenFL and HAXE. The name has been changed to “Catch Them All E”, “E” is for everywhere.
First, it was for the Tizen App Store and the wait. Its not much but have to wait for 3 days and finally its approved and available in the Store. Thats such a nice experience and could not have been possible without Joshua.

Well, then I did some modifications and ported it to HTML5. Though, OpenFL directly provides conversion, there are still things to consider while developing for different platforms. This version is available here.

Not too far behind, I ported it to iOS and submitted Apple store. Well it took 7 days and its on the Apple App store too.

I must say, without OpenFL and HAXE I could not have achieved all this.

Social plugin for Phonegap 2.6 and up

In my search to have the iOS 6 default social sharing plugin, I landed up at this page. While everything seems right for this plugin, I somehow faced some problems in the UX. Thought would look a little deeper into it and found that this plugin relies upon the old plugin architecture of Phonegap. It still works, but then if it does not, you know know why.
Now to implement social sharing in my project, I have done a quick round of update to the plugin. Its working in my phonegap version 2.6. And that should work on Phonegap 3 as well, as the new plugin implementation has not changed after version 2.0.
Here is the github link for the new plugin.
While currently this plugin only shares the link and the message, you have to send a third parameter as an empty string for the image parameter. I will do the code cleanup and fix as I get some time to look into it. For the time being, its ready to use in new Phonegap versions.

Happy coding :)

GruntJS for CSS minification

With GruntJS, as we saw in the last post, we can minify javascript files, the next in line is the CSS files.
I have updated the Github repo for using CSS along with Javascript files.
The basic setup is not different from javascript setup. Here we have to use

grunt-contrib-cssmin

The confusing part is, for minification we have a lot of options in NPM, and one of them is

grunt-contrib-mincss

So at first I was confused and it did not work for me. Seems like “mincss” is old and have not been updated for a long time. So I am with “cssmin” and that just works.
As usual, install cssmin locally, with

npm install grunt-contrib-cssmin

A note is, if you have “package.json” and “Gruntfile.js” file in the same location, take those files somewhere else while installing new packages from NPM, else it throws some errors. Once installation is complete, bring those files back and that should work as it was before.

Happy grunting.

Introduction to GruntJS

Developing in Javascript (in that case for frontend web-development) always feels manual provided you came across this nice library called GruntJS.
As the name suggests, it takes the grunt work out of the developers workflow. The repetitive and manual tasks could be automated with this nice library.
GruntJS requires NodeJS. Well, actually it does not require, it works on NodeJS. So the basic to get started is NodeJS. Once NodeJS is installed, one need to install GruntJS, locally per project. As of version 0.4, it is advised to uninstall the globally installed GruntJS module.
Must haves :
1. NodeJS installed
2. GruntJS installed locally.
3. Must uninstall GruntJS globally (if its already installed globally).

npm uninstall -g grunt

Link to the NPM Grunt package is here.

There we go, the basic setup to get started with our grunt work. Now to work with GruntJS, we need two files, which are as below;
1. Gruntfile.js (previously it was called grunt.js)
2. package.json
These two files are to be present right next to the locally installed GruntJS NPM module rather its the other way round. After deciding a place for GruntJS setup, in your work environment for the project, install the NPM modules locally in that folder. Next we can make these two files in the same folder.

The last and most notable task is to install the dependent task packages locally. These are the tasks we want to give GruntJS. For example, if we want to minify a JS file using UglifyJS, then we must install it locally for the project before using it.

npm install grunt-contrib-uglify

Finally, to fire up the grunt work, open the command prompt and navigate to the folder where we have the above two files and type;

grunt

Here is the github link to the setup, if you want to directly jump into the code.

Thats all, keep the grunt work to GruntJS.
Happy coding.

A Record is now on Play store

Continuing with my Cordova ( Phonegap ) exploration, I pushed a new Android application to Google Play store.
splash
The application is to record audio. Start the application, press the record to start and press again to stop. You are done with recording and audio file is stored in your local file system.
The application is again a standalone application and does not require to connect to internet. So its private, secure, offline and yours.

As usual, its open-source and the source code is in github. Would love to listen back your take on the application.

Phonegap ( cordova ) and iOS longtap

This is perhaps the most significant effect of using a webview for iOS development. When working with Phonegap(cordova) which uses WebView, the user gets a longtap event as it use to on a web browser. All sort of long tap menus will come up in an application using Phonegap (ex : select, copy etc).
To suppress these unwanted menus on a native application, which uses Phonegap(Cordova), there are a number of options found throughout the internet, but the one which worked for me is a style declaration as below.

/* Disabling the default iOS bevaviour of copy-paste on long tap */
*:not(input):not(textarea) {
	-webkit-user-select: none; /* disable selection/Copy of UIWebView */
    -webkit-touch-callout: none; /* disable the IOS popup when long-press on a link */

}

Happy coding :)

My first Android application on Play store, The Address.

theAddress
This is exciting to get my first Google Play store application. Previously I worked on some Android applications, but nothing was up there in the Play Store. For me its really a different experience pushing it to the Play store. Unlike pushing to Apple App store, the Play Store push feels like no brainer.
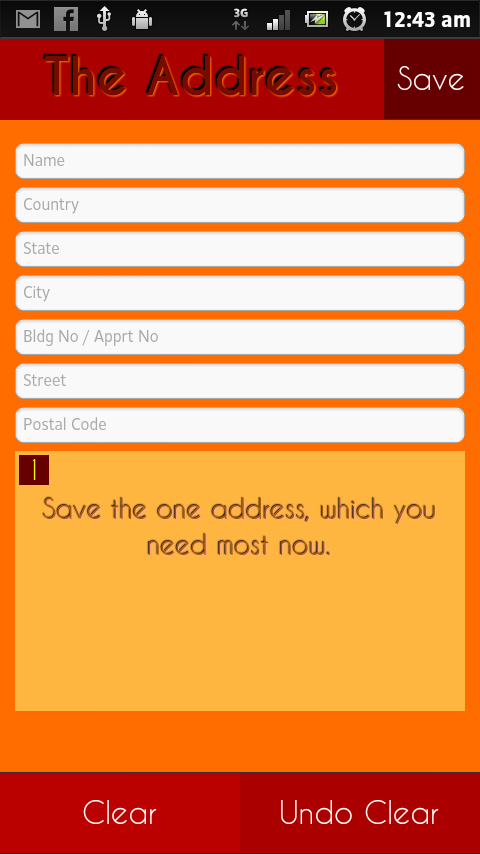
Now, talking about the application, its a personal note taking application for an absolute necessary address. This application does not require internet connection at all. Its a pure standalone application on its own. Its private to the user.
Open up the application, fill out the form to add an address and save it. Thats all it does. Once you come back to get the address, it shows upfront the saved address. Incase you are done with the currently stored address, update the form with a new address and save it. It does not store history of your previous addresses.
Now the implementation is done with Cordova (phonegap) 2.7 , jQuery 2.0 , jQuery Mobile 1.3 , lawnchair and GASP JS(GreenSock Animation Platform for Javascript). Its completely opensource and the code can be found at Github.

Looking forward to listen from you all.

Cordova(Phonegap), jQueryMobile and making a popup

This may seem obvious to make a pop-up with jQuerymobile with its popup API, but its a little more than just calling the api.
The problem is closing the popup. When working in a single page application in jQuerymobile and phonegap, the closing of the popup will take you to different jQueryMobile pages depending upon your setup.
The solution is to make the popup ready to be open just at the current page and while closing it should not make the application go to different pages. The trick is to while initialising the popup widget, initialise it with “{history: false}”, and thats all.
Here is a popup created with jQueryMobile API.

My PopUp

Title

Save Cancel

Here is the javascript code to initialise the widget and open it.

//making a popup which will not take you back to the previous page.
$('#popupDialog').popup({history: false});//awesomeness
$('#popupDialog').popup('open');

Happy coding :)

First book review : Aptana Studio Beginner's guide

This came to me as a surprise that I have been asked to review a book and write something about it. I started of with excitement as to finish the book as soon as possible and write something about it. So here it goes.
The book : Aptana Studio Beginner’s Guide
A nice book, as it states from its title. Which is unlikely, is its not only for “beginners only”. This is all you need to get started with Aptana studio but in general Eclipse IDE of any kind.
Aptana Studio itself provides a very solid IDE which is both free and opensource. I love this IDE as I do HTML and JS projects with this IDE. The most appealing thing about this IDE is its cross-platform, so one IDE, one experience everywhere. I must say its a must have for anyone who is serious about Javascript development in general.
Now to get the most out of this nice IDE, this companion book is a must have I would say to get you started and to know what can you do with the IDE.
This book starts with very basic things as to menus and workspace and then move on to deeper topics as to configure it to suite your working style. After working with this IDE for such a long time, I found this book reveals a lot more which came as surprise to me. Things like saving your own customised look and preferences, making shortcuts, the command-line interface inside the IDE and lot more are covered in detail, from a beginner’s perspective.

All in all a nice book to have if you want to get used to Aptana IDE in particular or Eclipse IDE in general.

Thanks a lot to Kenny Dias from Packt Publishing, who gave me this opportunity to review this book.