I learned it the hard way that once you have a site up and running its better to keep a backup of the same locally in your machine. There are chances that the whole of the content might get erased!! You call it a server failure, no backup plan or anything, but the end result would be loosing all your content along with the conversations. In my quest to get a simpler and straight forward backup plan, I found this nice plugin for WordPress, called “WordPress Backup to Dropbox“. This plugin allows a direct, scheduled backup of the site to Dropbox. All one has to do is, schedule the time and frequency of backup and thats all, everything else is simply automated.
Hope that helps someone out there.
Monthly Archives: August 2011
OpenPlug : ASlate, drawing application.
While learning OpenPlug|Studio and diving into the code, my third Android application is here. Its a simple drawing board, kind of slate. As an user one has option to select different color and pen thickness for drawing on it. Again a simple but usable application, which can be downloaded from this link.
The source code is availbale at Github too.
OpenPlug: Tic-Tac-Toe game
After my first application for Android with OpenPlug|Studio, I tried my hands on game development with it. So here is the basic Tic-Tac-Toe game done with it. The source code is available at GitHub.
Well, I must say if you are developing for Android, then it cannot be one size fit all. Every device is of different configuration in terms of screen size, resolution and capabilities.
First visit to "God's own country"
This is again a wild trip, a sudden decision and a fast move ![]() I must say if you want to feel real India, go with a friend, to his/her own place. Nothing like getting the raw experience. And if you do that, I am sure you will be amazed by the Indian tradition, hospitality and the thousand year old culture we still preserve on our country.
I must say if you want to feel real India, go with a friend, to his/her own place. Nothing like getting the raw experience. And if you do that, I am sure you will be amazed by the Indian tradition, hospitality and the thousand year old culture we still preserve on our country.
Kerala, often know as “The God’s own country” is truly stand up to its name. If you are by any chance in Bangalore, then there are buses and trains to reach the place. And my destination was Kannur.
View Larger Map
And I was travelling from Bangalore, so it was 9 hours journey in a bus on an average, though it took us 12 hours to reach as of traffic.
I was all tired and restless, but once we reach the place and spend some minutes there, then suddenly I regained the energy!! Well, its all nature every where ![]() and I mean every where. We went through trees all the time with narrow road and this is just beautiful experience. At night we visited local club and I am glad, people have just accepted me apart from the language barrier. I could not speak / understand Malayalam so my friend became the translator. Thanks a lot to him.
and I mean every where. We went through trees all the time with narrow road and this is just beautiful experience. At night we visited local club and I am glad, people have just accepted me apart from the language barrier. I could not speak / understand Malayalam so my friend became the translator. Thanks a lot to him.
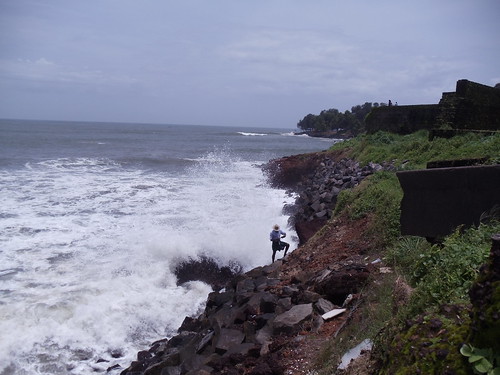
Next day was the visit to the sea, beaches and the town. We travelled with a motorbike and the pictures tell a thousand words!
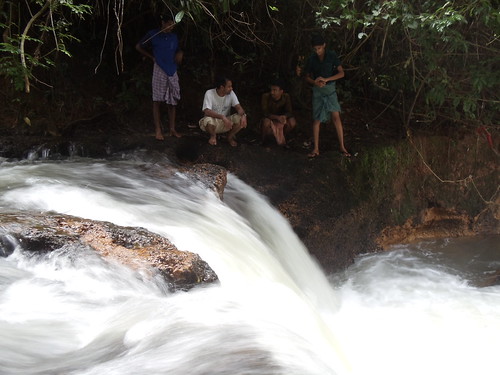
First time ever I was in a beach where one can drive bikes,scooters or four wheelers.
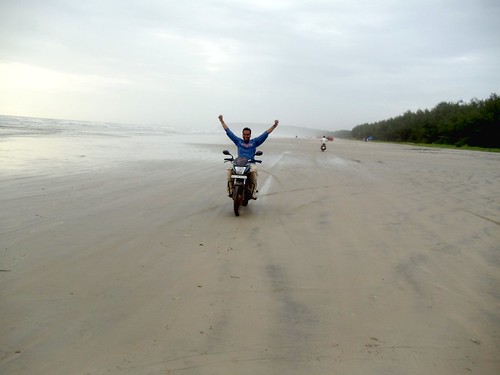

Amazed to see the beauty.
The same river, which I rafted earlier in my first water rafting experience, is grown in width and I saw it here too. The small river, flowing through the hills with its massive potential of forces, is grown to a huge river, some what calm and widespread.
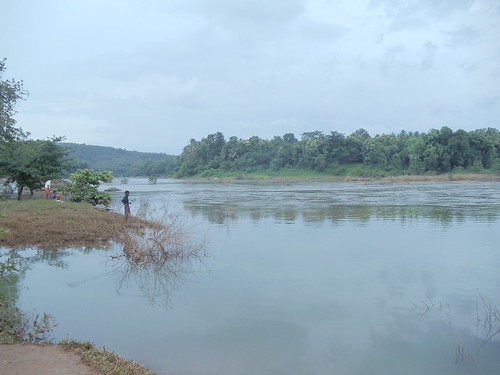
Then the spring and the diving experience in it, is just one has to experience.
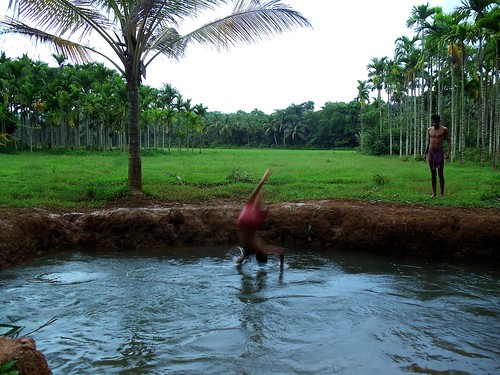
The atmosphere was cold, i was expecting chilling cold water in the fountain, but it was kind of warm water!!
Nature surely knows how to manage things and what best fits everyone.
First visit to “God’s own country”
This is again a wild trip, a sudden decision and a fast move ![]() I must say if you want to feel real India, go with a friend, to his/her own place. Nothing like getting the raw experience. And if you do that, I am sure you will be amazed by the Indian tradition, hospitality and the thousand year old culture we still preserve on our country.
I must say if you want to feel real India, go with a friend, to his/her own place. Nothing like getting the raw experience. And if you do that, I am sure you will be amazed by the Indian tradition, hospitality and the thousand year old culture we still preserve on our country.
Kerala, often know as “The God’s own country” is truly stand up to its name. If you are by any chance in Bangalore, then there are buses and trains to reach the place. And my destination was Kannur.
View Larger Map
And I was travelling from Bangalore, so it was 9 hours journey in a bus on an average, though it took us 12 hours to reach as of traffic.
I was all tired and restless, but once we reach the place and spend some minutes there, then suddenly I regained the energy!! Well, its all nature every where ![]() and I mean every where. We went through trees all the time with narrow road and this is just beautiful experience. At night we visited local club and I am glad, people have just accepted me apart from the language barrier. I could not speak / understand Malayalam so my friend became the translator. Thanks a lot to him.
and I mean every where. We went through trees all the time with narrow road and this is just beautiful experience. At night we visited local club and I am glad, people have just accepted me apart from the language barrier. I could not speak / understand Malayalam so my friend became the translator. Thanks a lot to him.

Next day was the visit to the sea, beaches and the town. We travelled with a motorbike and the pictures tell a thousand words!

First time ever I was in a beach where one can drive bikes,scooters or four wheelers.


Amazed to see the beauty.
The same river, which I rafted earlier in my first water rafting experience, is grown in width and I saw it here too. The small river, flowing through the hills with its massive potential of forces, is grown to a huge river, some what calm and widespread.

Then the spring and the diving experience in it, is just one has to experience.

The atmosphere was cold, i was expecting chilling cold water in the fountain, but it was kind of warm water!!
Nature surely knows how to manage things and what best fits everyone.
OpenPlug | Studio : things to consider
Talking about one code base and multiple devices is a tricky affair. In that case there are various frameworks and platforms which strive to do that. One of the most beautiful platform I found is OpenPlug|Studio. Well, being an Actionscript developer and working on Flex SDK, one will certainly feel at home with OpenPlug|Studio. Being said that, there are some very subtle differences to consider while creating applications with this platform compared to Flex itself.
1. Its loosely based on Flex 3 SDK. That means there are things like “mx” components like “WindowedApplication” is present in it. The work flow is similar to any Flex 3 based project. But then it is recommended to use “mob” namespace based components for they are mobile optimized for almost all devices. Again this OpenPlug|Studio SDK, which is known as Elips SDK only supports a subset of Actionscript 3.
2. Almost all the “mob” components are final classes. The immediate effect is one can not extend native “mob” components to create a new component.
3. The display object containers do not include “MovieClip”.
4. Using the available flex/actionscript frameworks is a strict no, as to one will end up writing the whole framework again for this OpenPlug|Studio (Elips SDK). For this ElipsSDK is a subset of Actionscript 3.
5. I was trying to open an image in the device with the default photo viewer application on Android, but then at the end came to know that this is not possible. Though Elips SDK provides the component, which can display the photo. I think, that indicates we can use Elips SDK to view images, run videos/audios with SDK components but can not directly force the default players/viewers of the device to launch the files.
6. About the “List” component I have already shared my views in the blog post earlier. Just use a default “ItemRenderer” to use the “List” component for the time being, until the Elips SDK fixes the bug.
7. Accessing the file system is a little tricky! I was trying to access file system of an Android phone , both phone memory and SD card memory. While the document says, it could be accessed as
Path to access memory card is: app-storage:/ExternalStorage/
Path to access internal memory is: app-storage:/InternalStorage/
In AIR, it corresponds to subfolder in app-storage:/, to keep Flash compatibility for simulation.
But in reality I could never get into the file system with them. The in-phone memory access I still have to find a way, the SD card file system can be accessed as
var extFolderPath:String = File.applicationStorageDirectory.nativePath+ "ExternalStorage";
var externalFolder:File=new File(extFolderPath);
8. Javascript can be used inside the Application with “script” tag as
mx:Script source="test.js"
This is interesting as from inside javascript file one can access the components with their “id” as one accesses them in Actionscript. But take care not to use any javascript libraries here as this is not DOM manipulation we are doing but using javascript syntax to do our Application. I have not tested the loose typing metaphor of javascript with a project, will update when I do that.
9. The OpenPlug|Studio is a free IDE and it works on both Mac and Windows. There is a plugin version, which could be installed over a FlashBuilder and a standalone version which could be installed separately without any dependencies. And the forum at the OpenPlug|Studio site is quite active, though it may not be instant but at least you will get your answers within a decent amount of time.
I thought would put my experiences here, so as to it may help someone out there with similar kind of problem.
Using List component in OpenPlug
OpenPlug|Studio ships with its own SDK and though it seem like FlexSDK dependent, there are native components to work with for mobile devices. The major or the most used native component is List and one can access it as
mob:List id="allSDCardFiles"
	x="0" y="0"
	height="100%" width="100%"
	rowHeight="45"
While it is expected to work fine and it does work fine in the simulator, but when tested on device (I have used an Android phone to test), the application simply crashed. Well the problem here is a bug in the baseSDK of OpenPlug. So till the bug is fixed the simple solution is to use a default itemRenderer. The fixed code will look as
mob:List id="allSDCardFiles"
	x="0" y="0"
	height="100%" width="100%"
	rowHeight="45"
        itemRenderer="ListItemRenderer"
That simply works every where from simulator to the device.
Hope that helps someone out there.
My first workable Android application, AFinder.
On my quest with different tools/languages, I started on OpenPlug|Studio for developing in Android. Though this is a tool for developing for multiple devices, I specifically tried this for Android for the time being.
This IDE is based on Eclipse and there are two flavors of installations. One installs it directly as a standalone IDE and you have option to install it over FlashBuilder. The development is also based upon the same component style development as in Flex SDK. There is a different name-space for mobile specific UIs. they start with “mob” rather than “mx”. From compiling to publishing as an .apk file for android device installations are quite straight forward. The best part about the IDE is its completely free. Well then it has potential as to one codebase and publish to multiple platforms. The community at OpenPlug|Studio forum seems active too and one can feel there are a lot going behind as to fix up bugs and add new features to the tool set. Though there are bugs and features to be added, but as I said, once you involve in forum, you got to know they are already working on it and new releases are happening almost in 2-3 months.
Here is my basic Android application to move around your file system on the device. Would love to listen the feedback.
Making menus with Html-CSS
Continuing the basics of HTML and CSS, lets go further to see how CSS really changes the way of rendering the basic HTML structure. We will be creating some horizontal menus with CSS. The basic HTML structure needed is nothing but an un-ordered list.
- Page One
- Page Two
- Page Three
Well, since these items are going to link to some other pages or other places, we must add some links to them. After all, what is a menu item without a path or link to it! So the final structure will be as below. Note that we have put all the items inside a div with id as “nav-Menu”.
In a real scenario the “href” value would be a real URL, either relative or absolute. But that is part of the content, let us concentrate on building the menus. So all in all the HTML part is over! Thats it! Yes, thats all to it. One simple un-ordered list with links in the list items.
Lets move on to design it with CSS, so that it looks as a horizontal menu items instead of vertical lists. First things first, lets get rid of the default styling of the list items, the CSS would be as below
#nav-Menu ul
{
	list-style: none;
}
Next is to push the list items so as to they come on one line. The CSS for these would be as below
#nav-Menu li
{
	float: left;
}
#nav-Menu li a
{
	float:left;
	display: block;
	width: 9em;
}
#nav-Menu
{
	width: 30em;
}
Thats all to it. One thing to remember here is everything now is a just fine for the menus. But there would be the contents after these menu items and they will be placed after the last menu rather than below the menu items. The fix is to add a style to the next elements with
#main-content
{
	clear: both;
}
Now its the time to add some more visually appealing style to the menu items we just created. These styles are basically margins, borders and color, so the final CSS for the menus look as below.
#nav-Menu ul
{
	list-style: none;
	padding: 0;
	margin: 0;
}

#nav-Menu li
{
	float: left;
	margin: 0 0.15em;
}

#nav-Menu li a
{
	float:left;
	display: block;
	width: 9em;
	height: 2em;
	line-height: 2em;
	border: 0.1em solid #DCDCE9;

	text-decoration: none;
	text-align: center;

	color: #0D2474;
}

#nav-Menu
{
	width: 30em;
}
Hurray, we have just created a horizontal menu bar with menu items from a simple HTML un-ordered list.
